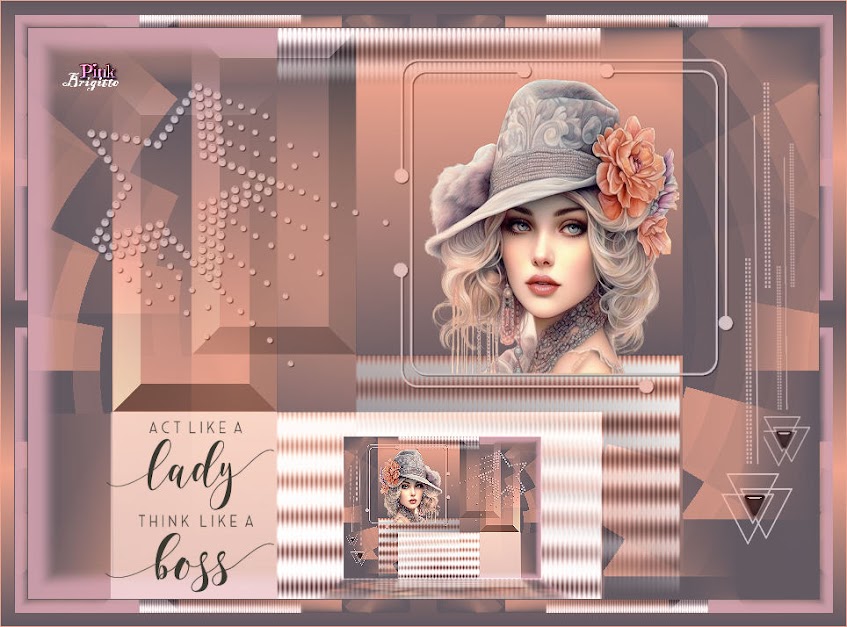
I created the tutorial on january 7, 2024 with the programm Corel Paintshop Pro 2018. It is also possible to make the tut with the other versions of PSP.
If there is something you don't understand, don't hesitate to contact me:
In the zip:
All the materials are made by me
It is not allowed to copy the tutorial and materials
Mehdi / Sorting Tiles
Pixelate / Sector Mosaic
Nik Software / Color Efex Pro 3.0
Alien Skin Eye Candy-5 Impact / Perspective Shadow
In Filters Unlimited 2.0:
AFH / AFH Beveler 2.0c
Install the plugins/ add the plugins in Filters Unlimited2.0 you don't have yet
Open the materials in PSP, duplicate and close the originals
Copy the seletions to the folder of selections of PSP
Foreground color at color 1 and backround color at color 2
Color 1: #5ca4bd
Color 2: #3a3932
Color 3: #c3dde7
Create a Linear gradient with the following settings
1
File / New Image of 900 x 650 pixels
Floodfill the image with the gradient
2
Effects / Plugins / Mehdi / Sorting Tiles
3
Selections / Load/save selection / Load selection from disc --- Sel-1-Les92_Pink
4
Selections / Promote selection to layer
Select None
Effects / Plugins / Pixelate / Sector Mosaic --- Default settings
(The filter uses the background color but I've discovered that in some cases the filter uses white #ffffff)
5
Activate the bottom layer of your layers palette
Selections / Load/save selection / Load selection from disc --- Sel-2-Les92_Pink
Selections / Promote selection to layer
Select None
Effects / Plugins / Pixelate / Sector Mosaic --- Default settings
6
Activate the bottom layer of your layers palette
Selections / Load/save selection / Load selection from disc --- Sel-3-Les92_Pink
Selections / Promote selection to layer
Effects / Plugins / <I.C.NET Software> / Filters Unlimited 2.0 / AFH / AFH Beveler 2.0c
Bevel width at 42, the rest at default settings
Select None
7
Activate the bottom layer of your layers palette
Selections / Load/save selection / Load selection from disc --- Sel-4-Les92_Pink
Selections / Promote selection to layer
Effects / Plugins / <I.C.NET Software> / Filters Unlimited 2.0 / Two Moon / WarmCloth --- Default settings
Select None8
Layers / Merge / Merge visible
Image / Rotate Right
Effects / Image effects / Seamless Tiling --- Stutter diagonal
Image / Rotate Left
9
Selections / Load/save selection / Load selection from disc --- Sel-5-Les92_Pink
Selections / Promote selection to layer
Select None
Layers / Properties --- Blendmode at Screen
10
Activate the bottom layer of your layers palette
Selections / Load/save selection / Load selection from disc --- Sel-6-Les92_Pink
Selections / Promote selection to layer
Select None
Effects / Plugins / Nik Software / Color Efex Pro 3.0 / Vignette --- Color 3
11
Copy Deco-1 and paste it as a new layer on your work
Layers / Arrange / Bring to top
Effects / Image effects / Offset
(By using other colors, put the blendmode at Luminance (lagacy))
12
Copy the tube and paste it as a new layer on your work
Effects / Image effects / Offset
Layers / Arrange / Move down
13
Copy Deco-2 and paste it as a new layer on your work
Effects / Image effects / Offset
(By using other colors, put the blendmode at Luminance (lagacy))
14
Copy Deco-3 and paste it as a new layer on your work
Effects / Image effects / Offset
(By using other colors, put the blendmode at Luminance (lagacy))
15
Layers / Merge / Merge Visible
Layers Duplicate
Image / Mirror / Mirror Horizontal
16
Image / Resize --- 25%
Adjust / Sharpness / Sharpen
Effects / Image effects / Offset
17
Effects / Plugins / Alien Skin Eye Candy-5 Impact / Perspective Shadow --- Reflect in Front, Short
18
Copy the text and paste it as a new layer on you work
Effects / Image effects / Offset
19
Image / Add borders / --- 1 pixel, Color 2
Selections / Select all
Image / Add borders --- 30 pixels, Color 2
Selections / Invert
Floodfill the selection with the gradient
20
Effects / Plugins / <I.C.NET Software> / Filters Unlimited 2.0 / Tile & Mirror / Mirrored & Scaled
Select None
21
Image / Add borders --- 1 pixel, Color 1
Add your signature and merge all layers
The tutorial is ready, save your creation


