

This tutorial is created and made at february the 7th of 2022 with the programm Corel PaintShop Pro X7. It is also possible to make the tut with the other versions of PSP. It will be handy to have some knowledge of PSP. If there is something you don't understand, don't hesitate to contact me.
You can reach me at this mail address: pinkdesignpsp@gmail.com
----------------------------------------------------------------------------------------------------------
Materials

In the zip:
1 tube, woman
1 misted tube
1 mask
2 brushes
1 selection
Color palette
I made and tubed the materials myself
It is not allowed to copy the tutorial and materials

----------------------------------------------------------------------------------------------------------
Plugins
Alien Skin Eye Candy 5 Impact / Glass
MuRa's Meister / Copies
Lucis / LucisArt
Andromeda / Perspective
In Filters Unlimited 2.0:
Filter Factory Gallery D / BurnUp
Filter Factory Gallery D / Vertigo
Two Moon / Swirler
----------------------------------------------------------------------------------------------------------
Preparation:
Open the materials in PSP, duplicate and close the originals
Copy the selection to the folder of selections of PSP
Add the brush with File / Export / Custom Brush, give it a name and save it

Color 1: #fad262
Color 2: #d13645
----------------------------------------------------------------------------------------------------------
1
File / New image of 900 x 600 pixels
Selections / Select all
Copy the woman tube and paste it into the selection of your work
Select None
2
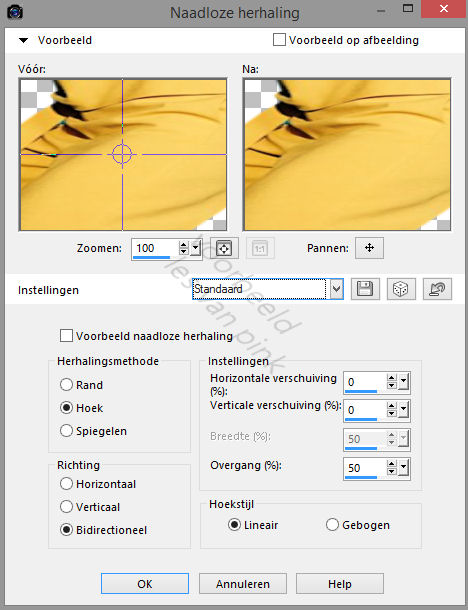
Effects / Image effectes / Seamless Tiling --- Default
3
Adjust / Blur / Gaussian Blur --- Radius at 50
Layers / Merge / Merge all (flatten)
4
Effects / Plugins / <I.C.NET Software> / Filters Unlimited 2.0 / Filter Factory Gallery D / BurnUp, Angle op: 137

5
Effects / Plugins / <I.C.NET Software> / Filters Unlimited 2.0 / Filter Factory Gallery D / Vertigo, Intensity op: 38

6
Effects / Image effectes / Seamless Tiling --- The settings are correct
7
Layers / Duplicate
Image / Resize --- 80%
8
Effects / Geometric effects / Circle

Layers / Properties --- Blend mode at Lunimance (legacy)
9
Selections / Load / save selection / Load selection from disc --- Sel-les60_Pink

10
Layers / New raster layer
Copy the misted tube and paste it into the selection of your work
Select None
11
Layers / Duplicate
Effects / Image effects / Seamless tiling --- the settings are correct
Layers / Porperties --- Blend mode at Screen
12
Layers / New raster layer
Flood fill the layer with color 1
Layers / New mask layer / From image --- Masker les 60_Pink

13
Layers / Merge / Merge group
Layers / Properties --- Opcity at 50
Effects / 3D effects / Drop shadow --- 0/0/50/35/Black
(By using another misted tube it can be prettier to move this layer down)
14
Layers / New raster layer
Tool Paint Brush, Brush 1 les 60_Pink with the following settings

15
Put the foreground color at color 2 and stamp the brush with this color at the left side of your work, see example

16
Layers / Arrenge / Move down
Layers / Duplicate
Image / Mirror / Mirror Horizontal
17
This is how the tag and layers palette looks like right now:

18
Click at the bottom layer of your layers palette
Edit / Copy
Paste the background as new image
Put the image aside for later use
19
Go back to your work
Layers / Merge / Merge visible
Effects / Plugins / Lucis / LucisArt

20
Image / Add borders --- 3 pixels, color 1
Layers / Promote background layer
21
Image / Resize --- 90%
Effects / Plugins/ Andromeda / Perspective

22
Adjust / Sharpness / Sharpen
Effects / 3D effects / Drop shadow --- 0/0/80/15/black
23
Layers / New raster layer
Floodfill the layer with color 1
24
Selections / Select all
Selections / Modify / Contract --- 5 pixels
Edit / Clear
Select None
25
Layers / Duplicate
Effects / Plugins / MuRa's Meister / Copies

26
Layers / Arrange / Move down
Edit / Repeat move layer down
Click at the top layer of your layers palette
Effects / 3D effects / Drop shadow --- The settings are correct
27
Copy the tube and paste it as a new layer at your work
Image/ Resize --- 70%
28
Adjust / Sharpness / Sharpen
Move the tube to the right, see example
Effects / 3D effects / Drop shadow --- The settings are correct
29
Go to the background you left aside
Selections / Load / save selection / Load selection from disc --- Sel-les 60_Pink
30
Selections / Promote selection to layer
Effects / Plugins / <I.C.NET Software> / Filters Unlimited 2.0 / Two Moon / Swirler

Leave the selecion active
31
Selections / Modify / Contract --- 60 pixels
Put the opacity of the flood fill tool at 60
Flood fill the selection with color 1
Put the opacity of the flood fill tool back at 100
Leave the selecion active
32
Selections / Modify / Contract --- 60 pixels
Flood fill the selection with color 1
Leave the selecion active
33
Effects / Plugins / Alien Skin Eye Candy 5 Impact / Glass --- Clear

Leave the selecion active
34
Effects / 3D effects / Drop shadow --- 0/0/100/35/Black
Select None
35
Image / Resize --- 7%
Adjust / Sharpness / Sharpen more
36
Effects / 3D effects / Drop shadow --- 0/0/80/15/Black
Effects / Plugins / MuRa's Meister / Copies
****The result can be different from my image because it is random****

Copy the deco you just made and paste it as a new layer at your work
Move the deco to the right, see example
If your deco turned out a little too big, you can erase a bit from it or resize it a little bit
37
Layers / New raster layer
Tool Paint Brush, Brush 2 les 60_Pink with the following settings

Stamp the brush with color 1 to the right side of the image or another nice spot
38
Effects / 3D effects / Drop shadow --- 1/1/100/1/Black
39
Click in your layers palette at Raster 1

40
Layers / Duplicate
Image / Resize --- 20%
41
Image / Mirror / Mirror Horizontal
Adjust / Sharpness / Sharpen
Move it to the bottom right, see example
42
Layers / Duplicate
Move it to above, see example
43
Add your signature
Layers / Merge / Merge visible
The tutorial is finished
Save your creation as PNG
of this tutorial
Another examples
The tube is made by Ellys

The tube of this example is made by myself


