The tutorial is created and made by Pink at the 23rd of august 2021 with the programm Corel PaintShop Pro X7. It is also possible to make the tut with the other versions of PSP. It will be handy to have some knowledge of PSP. I can speak and write in English but it is not my native language. So if there is something you don't understand, don't hesitate to contact me. You can reach me at this mail address: pinkdesignpsp@gmail.com
----------------------------------------------------------------------------------------------------------
Materials
In the zip:
1 deco
1 preset of Alien Skin Eye Candy 5 / Backlight
1 misted woman tube
1 misted flower tube
5 selections
1 text
color palette
I made the materials myself
----------------------------------------------------------------------------------------------------------
Filters
Mehdi / Sorting Tiles
Penta.com / Color dot
Simple / 4 Way Average
Alien Skin Eye Candy 5 Impact / Backlight
In Filters Unlimited 2.0:
Special Effects 2 / Border White Fade 1
----------------------------------------------------------------------------------------------------------
We make the animation with Animationshop
Preparation:
Open the materials in PSP and close the originals
Doubleclick at the preset of Aliën Skin Eye Candy 5
Foreground color: color 1 and background color : color 2, or choose 2 colors from one of your tubes
Color 1: #a96685
Color 2: #e21438
Color 3: #000000
***Pay attention: Some selections will be used more than once***
----------------------------------------------------------------------------------------------------------
1
Create of the fore and background color a gradient with the following settings:
2
Open a new image of 800 x 550 and floodfill the image with the gradient
3
Effects / Plugins/ <I.C.NET Software> / Filters Unlimited2.0 / Special Effects 2 / Border White Fade 1
4
Effects / Plugins / Mehdi / Sorting Tiles
5
Selections / Load/save selection / Load selection from disc --- Sel-1-les52_Pink
Selections / Promote selection to layer
Select None
6
Effects / Image effects / Seamless Tiling
7
Selections / Load/save selection / Load selection from disc --- Sel-1-les52_Pink
Selections / Invert
8
Effects / Plugins / Penta.com / Color dot
Select None
This is how the tag and layers palette looks like now:
9
Selections / Load/save selection / Load selection from disc --- Sel-2-les52_Pink
Layers / New raster layer
Put your foreground color at black #000000 and floodfill the selection with the color
Select None
10
Effects . Destortion Effects / Warp
11
Effects / Plugins / Simple / 4 Way Average
12
Effects / Texture effects / Blinds, Color white
Objects / Align / Left
Layers / Properties --- Blendmode at Screen and opacity at 65
This is how the tag and layers palette looks like now:
14
Copy the text and paste it as a new layer at your work
Objects / Align / Left
15
Selections / Load/save selection / Load selection from disc --- Sel-3-les52_Pink
Layers / New raster layer
Floodfill the selection with the foreground color (color 3 #000000)
Select None
16
Click in the layers palette at the bottom layer
Selections / Load/save selection / Load selection from disc --- Sel-4-les52_Pink
Selections / Promote selections to layer
Layers / Arrange / Bring to top
Leave the selection Active
17
Click in the layers palette at Raster 4
Effects / Plugins/ Alien Skin Eye Candy 5 Impact / Backlight --- Les 52_Pink Or with these settings:
Select None
18
Selections / Load/save selection / Load selection from disc --- Sel-3-les52_Pink
Selections / Invert
Edit / Erase
Select None
19
Layers / New raster layer
Layers / Arange / Bring to top
Selections / Load/save selection / Load selection from disc --- Sel-4-les52_Pink
Copy the Flowers tube and paste it into the selection
Select None
20
Layers / Porperties --- Opacity at 40
Effects / Edge effects / Enhance
21
Click in the layers palette at Raster 2
22
Copy the misted womans tube and paste it as a new layer at your work
Pick Tool (K of your Keyboard): Position X: 282 and Position Y: -184
Layers / Poporties --- Blendmode at Luminance (Legacy) and the opacity at 40
23
Click in the layers palette at the layer: Promoted Selection
Layers / Merge / Merge down
Selections / Load/save selection / Load selection from disc --- Sel-5-les52_Pink
Selections / Promote selection to layer
Select None
Layers / Arrange / Bring to top
This is how the tag and layers palette looks like now:
24
Add your signature (don't put it at the right side of the image)
Image / Add borders --- 2 pixels white
Selections / Select all
Image add borders --- 25 pixels, color 1
25
Effects / 3D-effects / Drop shadow --- 0/0/50/50/Black
Select None
26
Image / Add Borders:
2 pixels white
7 pixels color 1
Now we are going to make the animation
27
Copy the deco and paste it as a new layer at your work
Pick Tool (K of your Keyboard): Position X: 712 and Position Y: 120
28
Activate the misted womans tube
Image / Mirror / Mirror Horizontal
Image / Resize --- 80%
Adjust / Sharpness / Sharpen
Copy the tube and paste it as a new layer at your work
Layers / Arrange / Move down
29
Pick Tool (K of your Keyboard): Position X: 508 and Position Y: -1
30
Click in the layers palette at the top layer
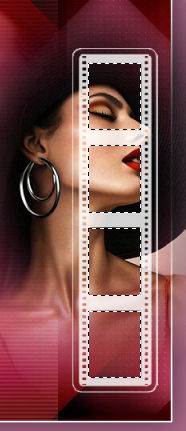
Select with the magic wand (Tolerance and feather at 0 and Mode at add) all the 4 frames, see example
31
Selections / Modify / Expand --- 2 pixels
Click in the layers palette at the middle layer (the layer with the tube)
Selections / Promote selection to layer
Select None
Delete the layer of the original tube
32
Toggle the visibility of the top layer off and activate the layer with the tube
Create with the selection Tool (Rectangle) a selection of the bottom part, see example
33
Selections / Promote selection to layer
Select None
Give this layer in your layers palette the name 1
34
Create the same way a selection of the other parts of the tube and promote the selections to layer and call them layers 2, 3 and 4
Than delete the layer Promoted selection:
Toggle the visibility of the top layer on again and make it active
This is how the tag and layers palette looks like now:
35
Effects / 3D-effects / Drop shadow --- 2/2/70/0/Black
36
Toggle the visibility of the layers 1,2,3 and 4 all off
Edit / Copy Special / Copy Merged
37
Open Animation shop
Edit / Paste as a new animation
Animation / Frame properties: 150
Go to PSP and toggle the visibility of layer 1 on
Edit / Copy Special / Copy Merged
Go to Animation Shop
Edit / Paste after active frame
Animation / Frame properties: 50
39
Repeat step 38 also for the layers 2, 3 and 4
Put the time of frame 5 at 150
This is how the frames look like now, at the bottom you can se the time of the frames:
The tutorial is finished, save your animation
Send your creation to: pinkdesignpsp@gmail.com
Other examples:


